Ah, the layered cake. A towering testament to baking prowess, a visual symphony of frosting swirls and colorful delights. But for many home bakers, the thought of stacking those perfectly baked layers can be enough to send shivers down their spines.
Fear not, cake enthusiasts! This post isn’t just a how-to; it’s your guide to building confidence and transforming those wobbly worries into cake-stacking serenity.
Understanding the Building Blocks
Before we start assembling our edible masterpiece, let’s peek into the science behind a stable cake. It all boils down to two key components:
- Level Layers: Imagine each layer as a sturdy brick in our cakey skyscraper. Uneven layers lead to leaning towers of Pisa, not picture-perfect creations. Use a serrated knife or cake leveler for laser-sharp precision.
- Filling Fun: The filling acts as the mortar, holding our layers together. Choose the right one – not too runny, not too stiff – for optimal stability and flavor. Buttercream, ganache, and jam are your trusted allies.
Tools and Techniques for Towering
Now, let’s equip ourselves with the tools and techniques for success:
- Turntable Power: This rotating platform is your best friend, allowing you to easily frost and assemble your cake without contortions. Imagine it as a potter’s wheel for your edible masterpiece.
- Offset Spatula: Your faithful frosting spreader and filling smoother. Think of it as a painter’s brush, creating even layers of deliciousness.
- Cake Board: The sturdy foundation upon which your cake kingdom rises. Choose the right size for your creation, and don’t forget a dollop of frosting in the center for extra grip.
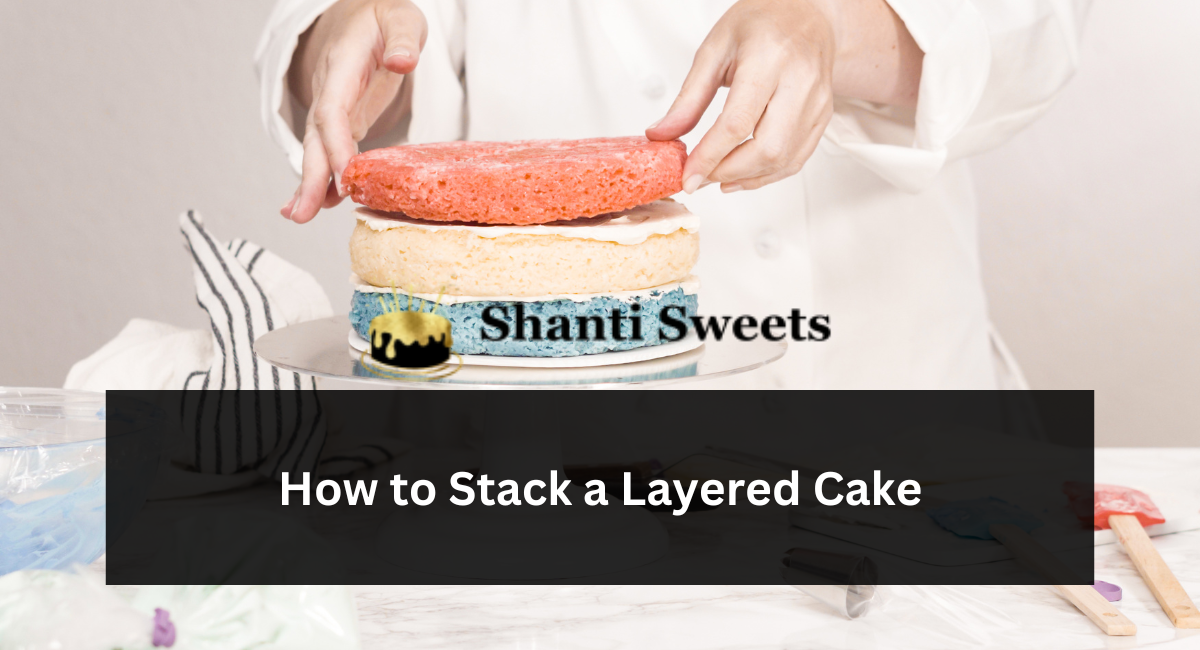
Layering Like a Pro
With our tools and knowledge in hand, let’s stack like a pro:
- Level Up: Place your first, cooled layer on the cake board. Use a leveler or ruler to ensure it’s perfectly flat. This is the cornerstone of your cakey castle.
- Dam It Up: For fillings that love to wander, pipe a ring of frosting around the edge of your layer. Think of it as a delicious retaining wall, keeping everything contained.
- Fill ‘er Up: Spread your chosen filling evenly within the dam, leaving a small border around the edge. Think of it as the fluffy heart of your cake sandwich.
- Gently Does It: Place the next layer atop the filling, pressing lightly to ensure even distribution. Repeat steps 2-4 until all your layers are stacked.
- Crumb Coat Magic: Apply a thin layer of frosting over the entire cake, sealing in any crumbs and creating a smooth canvas for the final masterpiece. Think of it as a primer for your artistic expression.
- Frosting Fantasy: Now comes the fun part! Unleash your inner creative with swirls, rosettes, or a perfectly smooth finish. This is your signature flourish, the final brushstrokes on your edible artwork.
Troubleshooting Tips for Fearless Bakers
Don’t let minor mishaps deter you! Here are some solutions to common challenges:
- Uneven Layers: Don’t panic! Use extra filling to camouflage any gaps or unevenness. Remember, rustic charm is in!
- Cracked Cake: It happens! Frosting will cover most imperfections, and the filling will hold everything together.
- Filling Overflow: Did your dam fail? Use a spoon to gently nudge the filling back into place. You can also trim the edges carefully with a serrated knife after assembling.
Share and Savor Your Creation
There’s nothing quite like the joy of slicing into a homemade layered cake, especially one you stacked with confidence.
So bake with love, practice your skills, and remember, even the most imperfect cake is a delicious work of art waiting to be shared.
Let’s celebrate the beauty and deliciousness of layered cakes, one perfect slice at a time!
Leave a Reply